Below are the steps to install and process a sample WCPS query by QGIS WCPS Plugin in QGIS version 3
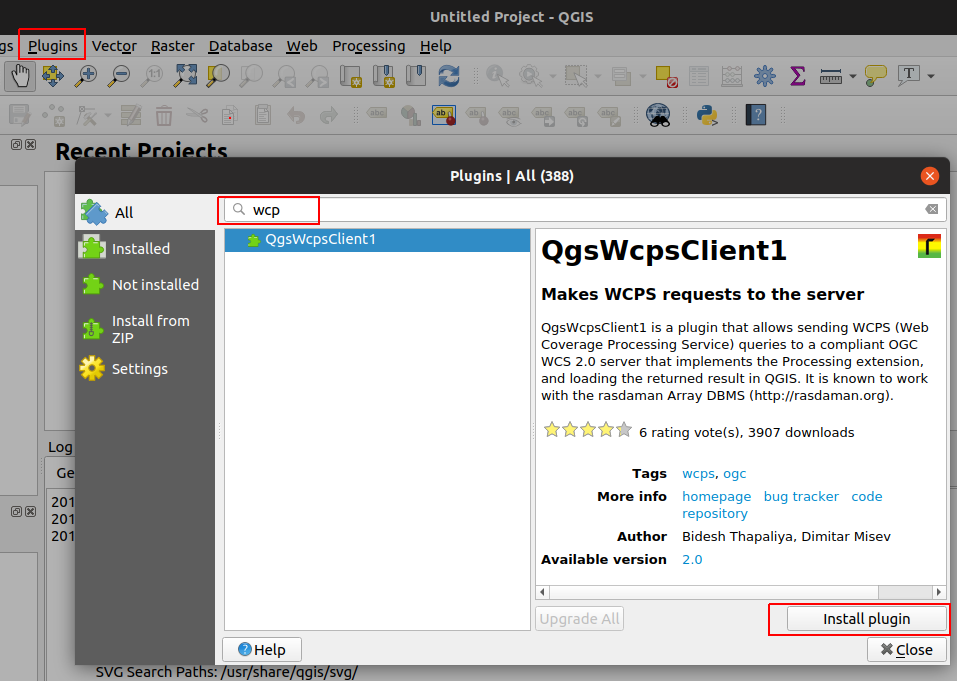
Step 1: Install the WCPS Plugin
Select the Plugins menu in QGIS toolbar. A dialog will appear, then type WCPS
in the textbox to search for the QgsWcpsClient1 plugin to install.
Step 2: Open the WCPS Plugin
After the QgsWcpsClient1 plugin is installed, a rasdaman icon will appear on the menubar. Click on it to open the plugin.

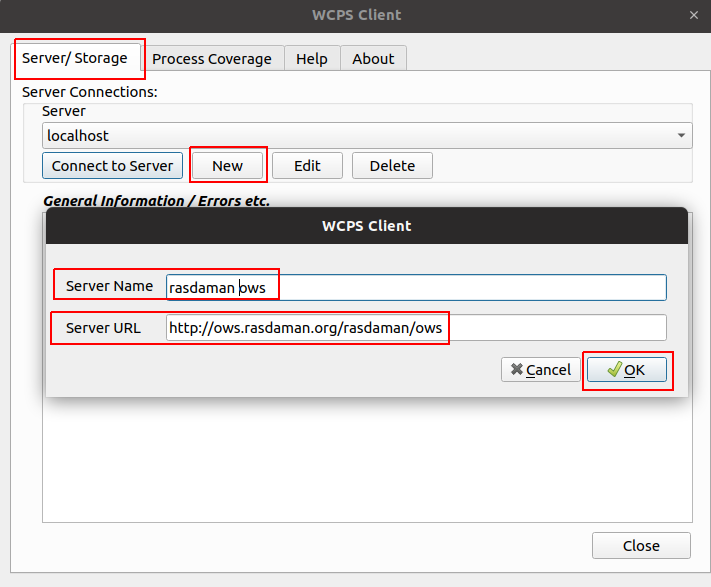
Step 3: Create a new connection to server endpoint
Here, you need to create a connection to a server which implements OGC WCPS standard (for example: rasdaman's WCPS demo endpoint: http://ows.rasdaman.org/rasdaman/ows).
Click the New button to open a dialog, then, type the server name (can be varied) and the server URL to the server endpoint.
Finally, click the Ok button to add this new server connection to the list of servers can be used.
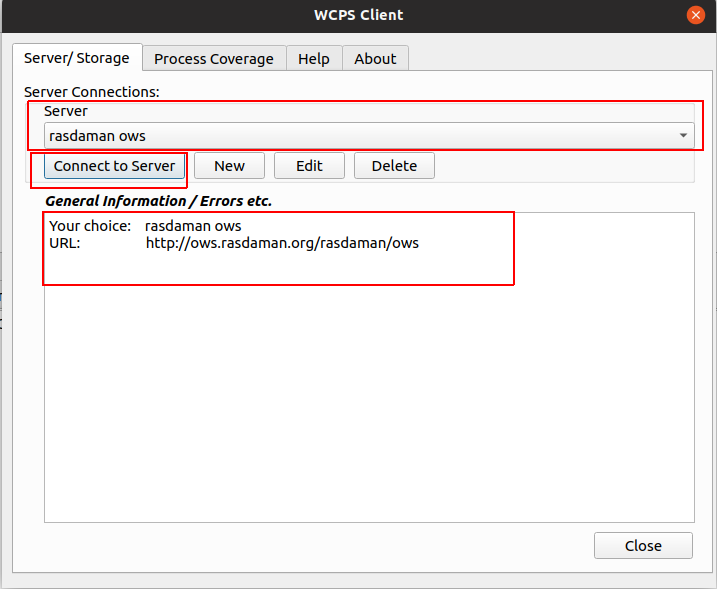
Step 4: Select a server connection
Select the dropdown menu of available server connections and select the rasdaman ows element (the newly added server connection).
Then, click the Connect to Server button to connect to this server endpoint.
Step 5: Type a WCPS query and view a result
In the Process Coverage tab, type the WCPS query in Queries text box. The query must return a 2D image.
Then, click the ... button to select a local folder path to store the image result.
Finally, click the ProcessCoverage button and the image result will show in QGIS's main panel.
